How to Setup VPN in Windows 7
Contacts
How to Setup VPN in Windows 7
Windows 7 VPN Setup:
1. Click "Start" button, "Control Panel" and choose "Network and Sharing Center". Choose "Set up a new connection or network"

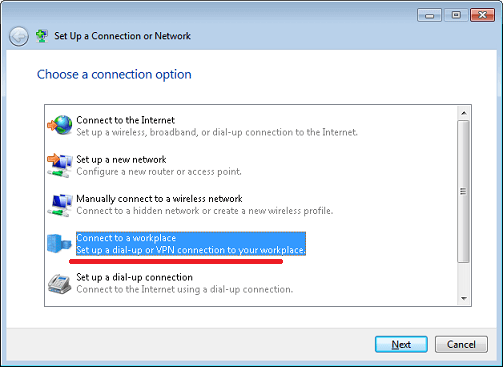
2. Choose "Connect to a work place" and click Next
3. Choose "No, create a new connection" and click Next

4. Click "Use my Internet connection"

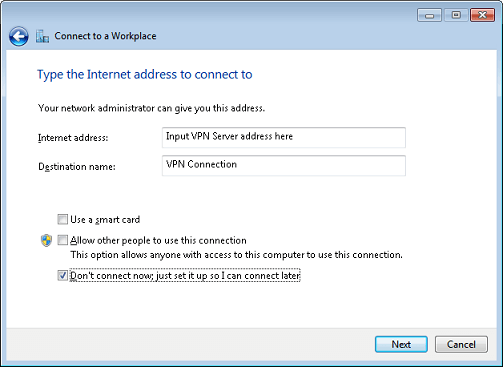
5. Input VPN server address from your account data into "Internet Address" text box.
Please be carefully - don't use any additional symbols like spaces, http://, www, / ...etc in the server address.
Input "Destination Name".
It's just a name of your connection. For example it can be "VPN Connection".
Click "Next" button
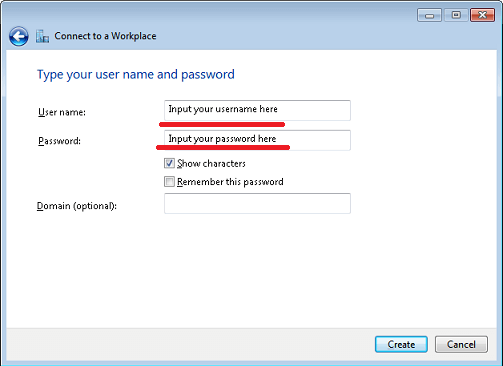
6. Input your Username and Password. All the letters should be small!
Click "Create" button and and then Close the window.
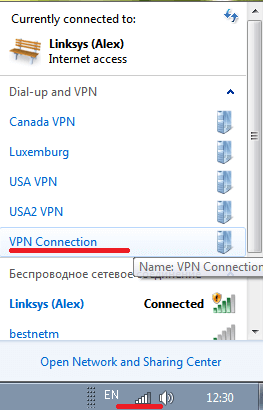
7. Click on your Internet connection icon in the right bottom corner (it can be WiFi or Cable icon) and you will see your VPN Connection. Click twice on it.
8. Click "Properties" button

9. Choose "Security" tab and select "Optional encryption". Click OK button to save these settings.

10. Click "Connect" button to connect to VPN server